
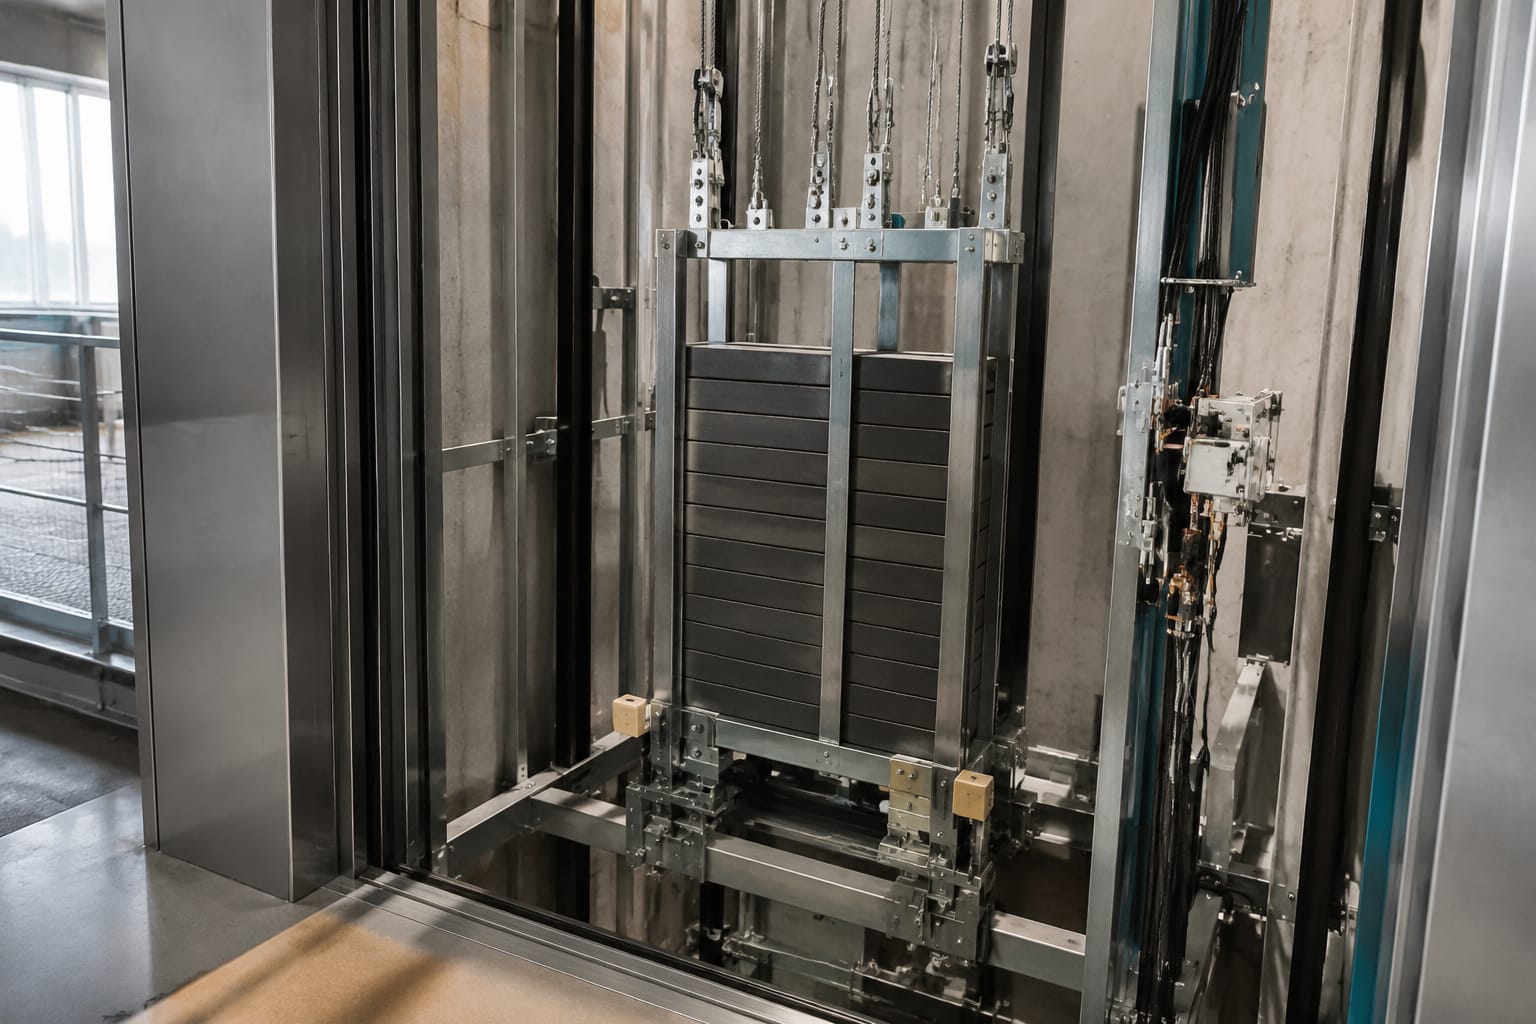
An elevator counterweight balances the car and a portion of its rated load so a traction elevator can move efficiently and maintain proper traction. It is not simply a stack of metal weights: its frame, filler weights, guide shoes, rail system, suspension connection, and lower travel protection all have to work together.
For maintenance and modernization teams, the practical priority is to keep the counterweight guided, retained, and within its designed travel clearances. Any replacement part must match the existing equipment’s dimensions, connection method, rail profile, and manufacturer documentation. A visually similar component is not necessarily compatible.
Why traction elevators use counterweights
In a conventional traction elevator, hoist ropes pass over a traction sheave. The elevator car is suspended on one side of the sheave, while the counterweight is suspended on the other. The counterweight offsets the mass of the empty car plus a design-specific portion of the rated load.
This balance reduces the work the machine must do during normal travel. When the loaded condition changes, the system is still intentionally unbalanced in one direction or the other, but far less than it would be without a counterweight.
The counterweight also supports reliable rope traction. The system’s design accounts for car weight, rated capacity, rope arrangement, sheave characteristics, travel, and other installation-specific conditions. Its correct mass cannot be determined by applying one universal percentage to every elevator.
Do not alter counterweight mass casually during repair work. Adding, removing, or substituting filler weights can affect balance, traction performance, stopping behavior, and clearances. Weight changes should be evaluated against the elevator manufacturer’s information and applicable inspection requirements.
Counterweight frame and filler weights
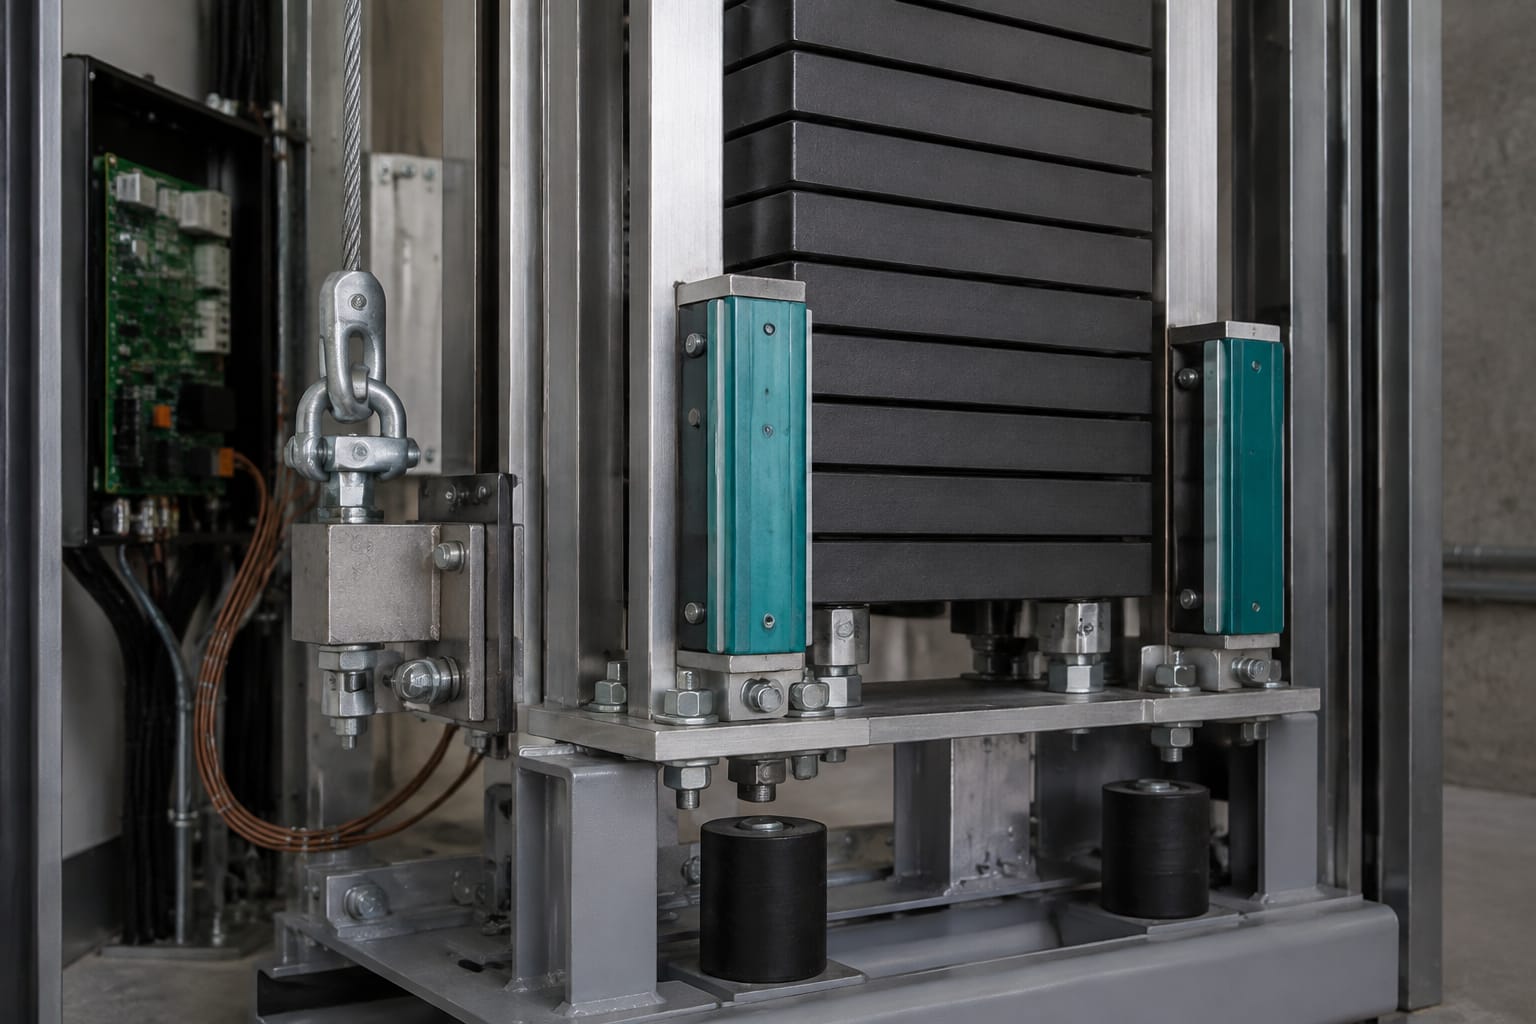
The counterweight frame, often called a counterweight sling, is the structural assembly that carries the filler weights. It typically includes vertical members, a top connection area, a bottom member, and retention hardware designed to keep the weights contained throughout normal operation and foreseeable operating conditions.
Filler weights provide the needed counterweight mass. Depending on the system, they may be cast iron, steel, or another approved material and may be stacked as individual plates or blocks inside the frame. Their dimensions, mass, and stacking arrangement are part of the original design.
What the frame must do
A sound counterweight frame must:
- Carry the installed filler weight without deformation or cracking.
- Transfer the suspension load through its intended connection points.
- Keep filler weights from shifting, escaping, or contacting adjacent hoistway components.
- Maintain the designed relationship between the counterweight, guide rails, buffers, and hoist ropes.
- Provide secure attachment points for guide shoes and, where applicable, compensation equipment.
Inspectors and technicians should look closely at the top and bottom members, welds, bolted joints, cross members, weight-retaining plates, and any hardware that restrains the filler weights. Loose or missing retainers are a serious finding because filler weights can move or leave the frame under abnormal conditions.
Filler-weight replacement considerations
When replacing a damaged or missing filler weight, confirm more than the total mass. Important checks include:
| Check | Why it matters |
|---|---|
| Individual weight mass | Maintains the intended balance calculation and load distribution. |
| Overall dimensions | Prevents interference inside the frame or inadequate retention. |
| Thickness and stacking pattern | Affects frame fill height, retaining hardware engagement, and clearances. |
| Material and condition | Avoids cracked, corroded, or unsuitable weights. |
| Frame compatibility | Ensures the weight bears on intended surfaces without movement. |
| Required retention method | Keeps the completed stack securely contained. |
A common mistake is treating generic steel plate as interchangeable with a purpose-made filler weight. Even when the scale reading is close, edge condition, thickness, fit, and secure retention can be wrong. Use an approved replacement approach for the specific elevator system.
Guide shoes and guide rails
Counterweight guide shoes hold the counterweight in alignment as it travels on its guide rails. They do not carry the suspended counterweight load; they guide the frame and limit lateral movement. Correct guidance protects the rails, reduces noise and vibration, and helps preserve required clearances between moving equipment.
Counterweight rails are commonly distinct from car rails in size, profile, loading, or installation details. The shoe, liner, and rail must therefore be treated as a matching system.
Sliding and rolling guidance
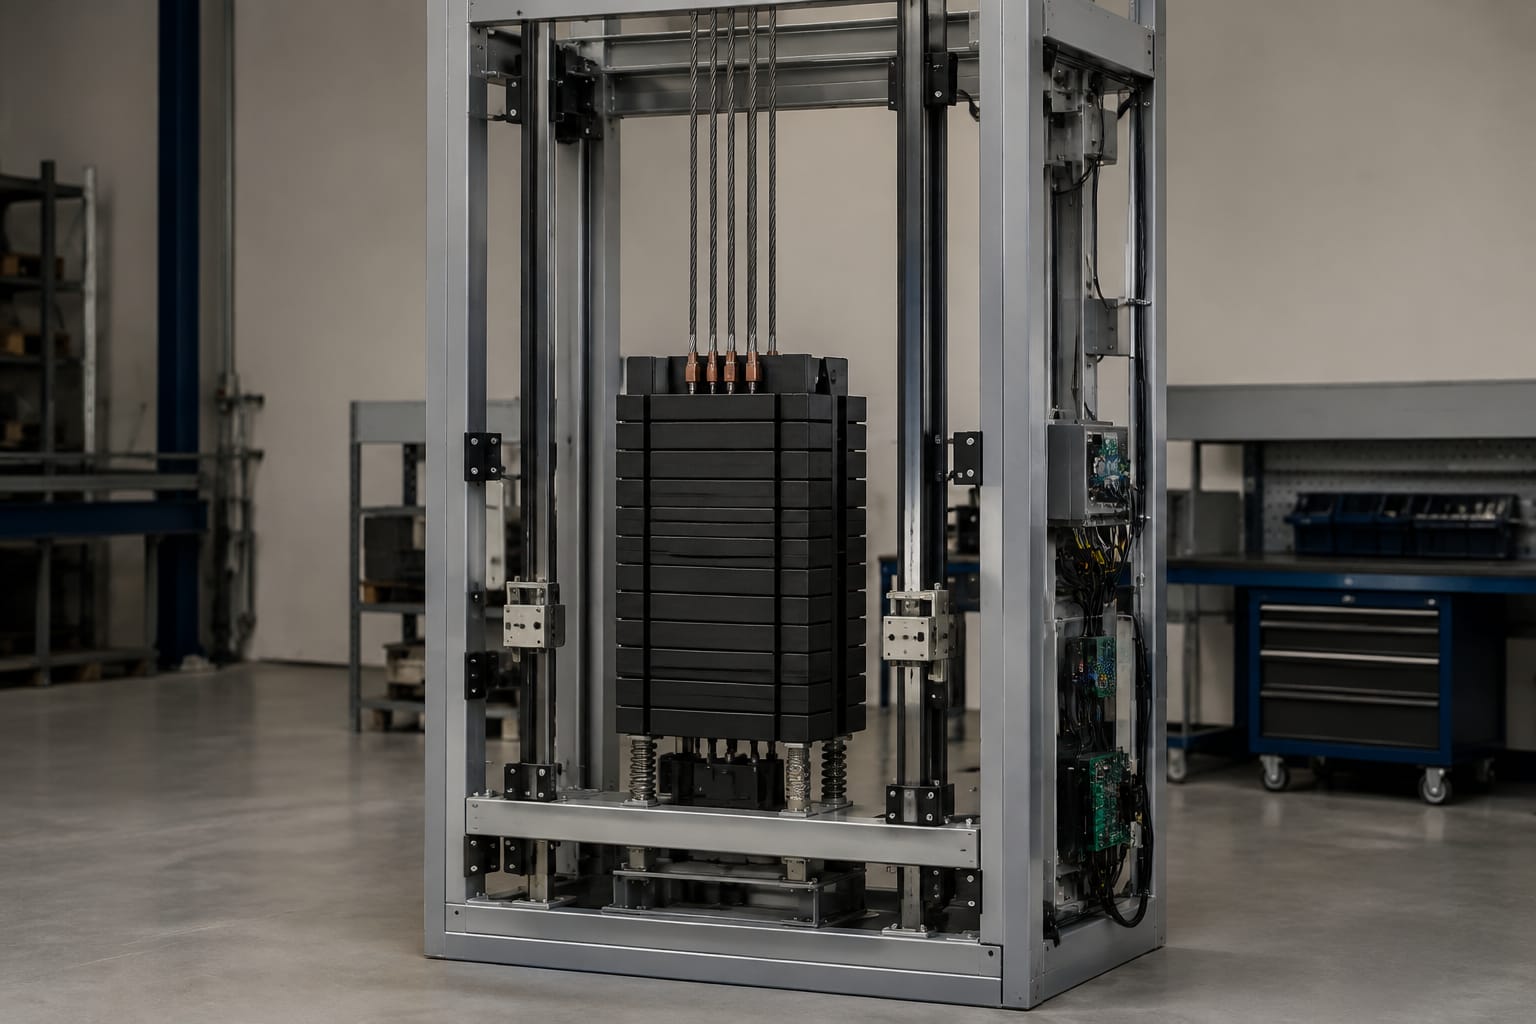
Many counterweight assemblies use sliding guide shoes with replaceable liners. The liner contacts the rail and is intended to wear before the shoe body or rail does. Other applications may use roller-style guide assemblies, especially where the original system calls for them.
The right selection depends on the existing design. Do not change from a sliding shoe to a roller guide, or vice versa, merely because another option appears easier to source. That change can alter clearances, adjustment range, rail contact, and equipment behavior.
For counterweight assemblies using a hollow rail and boot-style liner arrangement, compare the rail profile, boot location, liner dimensions, and mounting pattern carefully. Relevant examples include counterweight hollow-rail W boot toe boot linings, counterweight hollow-rail W M-type boot linings, and auxiliary rail guide boots for Mitsubishi and Otis applications. The application description is a starting point for identification, not proof of interchangeability.
Rail and shoe inspection points
Inspect the full accessible travel path for:
- Worn, cracked, missing, or hardened guide-shoe liners.
- Uneven liner wear that may indicate rail alignment or shoe-adjustment issues.
- Loose shoe mounting bolts, damaged housings, or inadequate adjustment.
- Rail contamination from oil, debris, paint, or foreign material.
- Rail joint irregularities, damage, corrosion, or displaced fastening.
- Evidence of counterweight contact with brackets, building elements, or other hoistway equipment.
Replacing only the visibly worn liner can be incomplete if the rail is damaged or the shoe body is misaligned. Investigate the cause of abnormal wear before returning the equipment to service.
Compensation and suspension connections
The counterweight is connected to the traction system through the suspension arrangement specified for that elevator. This may involve hoist ropes, hitch plates, shackles, fasteners, equalizing components, or other manufacturer-specific connections. The exact arrangement varies by roping ratio, machine layout, elevator type, and original design.
On longer-travel installations, compensation ropes or chains may also be installed between the car and counterweight. As the car moves, the relative amount of suspension rope on each side of the machine changes. Compensation equipment helps offset the changing rope weight and can improve balance and ride behavior.
What to verify
A maintenance review should verify that suspension and compensation components are:
- Connected at the correct designated attachment points.
- Secured by the specified hardware and retaining method.
- Free of broken wires, corrosion, deformation, abnormal wear, and unauthorized modifications.
- Properly routed without rubbing on guards, brackets, rails, or other equipment.
- Consistent with the equipment manufacturer’s requirements for tension, termination, and equalization.
Compensation chains and their associated tensioning or take-up arrangements deserve particular attention. Excessive wear, an out-of-position chain, damaged guides, or contact with the pit can create noise, damage, or a hazardous condition.
Never infer a suspension connection from another elevator that happens to use the same nominal rope size. Connection geometry and load paths are equipment-specific.
Clearance and retention considerations
The counterweight must have adequate clearance from the hoistway structure, car equipment, rails, brackets, governor components, and other moving or fixed items throughout its travel. It must also maintain the intended relationship to pit buffers and any other lower-terminal protective components.
At the bottom of the hoistway, the counterweight normally has a defined relationship with its buffers. The buffer type and required clearance depend on the elevator’s design, speed, travel, and governing requirements. A buffer is not an ordinary travel stop; it is a protective device for an overtravel condition.
Key concerns include:
- The counterweight frame or filler weights must remain fully retained.
- Guide shoes must remain engaged with the rails through the normal travel range.
- The counterweight must not foul buffer supports, pit equipment, or structural projections.
- Added equipment, such as guards or monitoring devices, must not reduce required clearances.
- Modifications to car weight, cab finishes, or capacity-related equipment may affect system balance and terminal relationships.
Clearance questions should be resolved with the applicable elevator documentation and the authority having jurisdiction where required. Field measurement is essential, but measurements alone do not replace an engineering or manufacturer review when the original configuration has changed.
Common wear and inspection findings
Counterweight problems often first appear as noise, rail markings, vibration, uneven guide-liner wear, or debris in the pit. These symptoms may be caused by the counterweight itself, but they can also originate from rail alignment, bracket movement, suspension issues, or car-side conditions.
Common inspection findings include:
| Finding | Likely concern | Appropriate follow-up |
|---|---|---|
| Grooved or uneven shoe liners | Misalignment, rail contamination, poor adjustment, or worn rail | Inspect rail condition, shoe mounting, adjustment, and travel clearances. |
| Loose filler-weight retainers | Potential weight movement or loss of containment | Remove from service as appropriate, correct retention, and inspect all frame hardware. |
| Bent frame members or cracked welds | Structural damage or past impact | Assess the frame against manufacturer requirements; do not straighten structural parts without approved direction. |
| Rail rub marks on the frame | Insufficient clearance or displaced guide components | Identify the contact point and confirm rail, shoe, and frame alignment. |
| Corrosion at frame or connection points | Reduced condition of structural or attachment components | Determine extent, source of moisture, and whether replacement is required. |
| Debris near buffers or in the counterweight path | Obstructed travel or evidence of component wear | Remove the cause safely and inspect for related damage. |
| Abnormal compensation-chain wear | Routing, guide, tension, or take-up issue | Inspect the complete compensation system, not only the worn segment. |
A good inspection records the part location, observed condition, measurements where useful, and the specific equipment identity. Vague notes such as “counterweight worn” make follow-up sourcing and corrective work harder.
Replacement-part identification
Correct identification starts with the elevator, not with a loose part. A guide shoe liner, boot, frame component, or retention part needs to be tied to the equipment where it operates.
Before requesting a replacement counterweight component, gather:
- Elevator manufacturer, controller or job identifier where available, and unit location.
- Counterweight frame dimensions and the component’s mounting position.
- Rail profile and measured rail face or head dimensions where relevant.
- Part number, casting number, stamped marking, and all readable labels.
- Clear photos showing the installed part, mounting holes, adjacent rail, and overall assembly.
- Measurements for length, width, thickness, hole spacing, and any offset or lip.
- The existing material and whether the part is a sliding liner, shoe body, roller, retainer, filler weight, or connection component.
- The reason for replacement, such as normal wear, breakage, corrosion, missing hardware, or modernization work.
For B2B sourcing teams, photos and measurements are especially important when the original manufacturer part number is unavailable. They help distinguish parts that look similar in a catalog but differ in rail interface, handedness, attachment spacing, or required lining material.
Kelevator supplies multi-brand elevator spare parts to B2B importers, distributors, maintenance contractors, modernization companies, and OEM buyers. For any multi-brand replacement request, confirm the technical match against the installed equipment rather than selecting on brand name alone.
Compatibility questions to ask before ordering
Ask the supplier or internal technical reviewer:
- Is this part designed for the installed rail type and frame configuration?
- Does its mounting pattern match without drilling, shimming, or modification?
- Is the liner material appropriate for the original guide-shoe design?
- Are required retainers, fasteners, or inserts included, or ordered separately?
- Is the part intended for the counterweight position rather than a car-side application?
- Does the proposed replacement preserve the original operating clearances?
Avoid ordering from a single photo when critical dimensions are not visible. A short verification step is less costly than discovering a mismatch during a shutdown.
Safety precautions for counterweight work
Counterweight work takes place around suspended loads, moving machinery, tensioned ropes, and restricted hoistway clearances. It should be performed by qualified elevator personnel using the site procedures, manufacturer information, and applicable safety requirements.
Before work begins:
- Take the elevator out of normal service and control access to the work area.
- Establish the car and counterweight positions needed for the task using approved procedures.
- Apply lockout/tagout and verify that hazardous energy and unintended movement are controlled.
- Protect personnel from exposure to the counterweight path and suspended components.
- Use approved lifting, blocking, rigging, and fall-protection methods where the task requires them.
- Never stand, work, or place tools in the counterweight travel path unless it has been made safe by the appropriate procedure.
- Do not remove filler-weight retainers, guide shoes, suspension hardware, or structural components until the load is properly supported.
- Keep the pit clear of loose weights, tools, packaging, and materials before testing travel.
After replacement or adjustment, inspect the work for secure fasteners, retained filler weights, correct guide engagement, unobstructed travel, and restored guards. Functional checks should be performed only under the applicable commissioning or return-to-service process.
FAQ
What is the purpose of an elevator counterweight?
An elevator counterweight balances the car plus a design-specific share of its rated load. This reduces the traction machine’s work and helps the traction system operate as designed.
Can counterweight filler weights be added or removed to fix a ride problem?
Not as a routine field fix. The counterweight mass is part of the elevator’s balance and traction design. Ride problems may instead involve guide rails, shoes, ropes, suspension equalization, or compensation equipment. Any mass change should be evaluated using the equipment documentation and applicable requirements.
How often should counterweight guide shoes be inspected?
Inspect them as part of the elevator’s regular maintenance program and whenever there is noise, vibration, rail damage, abnormal debris, or evidence of contact. The necessary interval depends on equipment usage, environment, and local maintenance requirements.
Are counterweight guide shoes interchangeable between brands?
Sometimes parts may be dimensionally compatible, but brand labels alone do not establish interchangeability. Confirm rail profile, mounting pattern, liner type, dimensions, and the original application before ordering.
What should be done when a counterweight frame is bent?
Treat it as a structural-condition issue. Determine the cause, inspect for related rail, buffer, or hoistway damage, and follow the manufacturer-approved repair or replacement path. Field straightening without approved direction can compromise the assembly.
A practical next step is to document the installed counterweight assembly with clear photographs, part markings, rail measurements, and the observed wear condition before selecting any replacement component.
Related product references
For practical catalog examples related to this topic, review Counterweight Hollow rail W boot toe Boot lining lift parts elevator accessories, Counterweight hollow rail W M type boot lining lift accessories elevator spare parts, and Auxiliary rail guide boots counterweight hollow rail W boot head boot lining suitable for Mitsubishi Otis elevator accessories. Confirm the exact model, dimensions, ratings, and connectors before ordering.